The nobility at the University of Denver have surrendered and agreed to crown me a Master of HR, and now at long last, I am able to return to the Sewing Dungeon and finally get to the big pile of your requests that have shamefully languished these last few months. 😭😍
My thesis project topic (I had only 10 weeks to complete it) was none other than work-life balance and why it matters so very, very much. To the overworked, underpaid and stressed out masses and to everyone who has ever worked in a toxic culture or for a manager who is always looking for reasons to say no, I see you. 💖 Truly, when peoples' non-work needs are considered valid and efforts are made to accommodate them, the results are amazing. Happy people do the best work.
I have always been goofy and creative, and thankfully I had two teachers in the 1980's who recognized that I'm real smart, but my brain was just wired differently... they said "don't ever let them [society, school, etc] change her." I named my two daughters after those two teachers. They have since passed away, but I made sure they knew my two daughters were named after them.🥰
So Marilyn Holliday and Helen Murray, my beloved childhood teachers, thank you SO much, may you both rest in happy peace. I may have struggled for many years, but your encouragement to be my authentic self gave me the courage to quit a job I realized was a toxic dead-end, and the courage to pursue my crazy dream. If you're a teacher and you're reading this, don't lose hope - your student(s) may struggle, sometimes for years, but as long as they are able to stay true to themselves, things WILL work out in the end!!
I may never end up back in corporate HR because too many companies get work-life balance all wrong and I'm not willing to co-sign that sort of mediocrity. My fifth-grade teacher's mantra really has stuck with me all these years: "work hard, and then play hard". Too many folks subscribe to the belief that adults should not play, that being silly is to give up one's maturity - nonsense! Having fun, decompressing in healthy ways to cope with stress is absolutely one of the core pillars of a good adulthood and the mark of highly effective people. Absolutely play, have fun, de-stress. 🥳
Speaking of playing hard after working hard, I'm a terrible introvert and had to present my thesis including a video of myself presenting. I loathe being on video, I hate presenting, and I only had time for about three practice runs, so for laughs, here is the snark version of my thesis presentation, done in costume. In HR we call this "malicious compliance". I was exhausted and worn out and scrambling to submit the paper itself and humor is stress relief for me.🤪 As a child I once told my mother "if it's worth doing, it's worth doing in costume" and I have held to that pretty well. 😇 When in doubt, bring out the Viking horns and the welding goggles.
I scored a 98.5% on this, and earned my degree with all A's and a 3.9 GPA.
It is okay to use humor - don't let anyone tell you otherwise. At one prior Admin job I worked, I was the "safety captain" for an area of 120+ people... I started sending out my announcements in funny, snarky poetry - it was very effective because people would actually read my emails.... and they remembered them too. 😎 My manager there was so cool... not only did he laugh at my emails, but he recognized that my humor and positivity boosted morale for the entire department, got folks to pay attention to safety issues, and he gave me a performance bonus. 🙂
For the folks that have so patiently waited for me to get to their requests, your long wait is almost over. The long siege of the Castle of Academia is now over! I must briefly pay homage to the guild masters at the Cheyenne Mountain Holiday Craft Fair this Saturday December 3rd, and then I shall fully return to the Sewing Dungeon as well as catch up on photos of my secret stash of finished works. I'm about 5 coats behind on photos, as well as about 40 hats/arm-warmers and some leg-warmers. I shall remedy this as soon as humanly possible! Previews of the coats will show up on Facebook as soon as I've got photos. 🥳
⚔⚔⚔Huzzah! ⚔⚔⚔
Oh man, grad school with ADHD is tough and tends to take up most of my time/energy, so I haven't gotten much studio time in the last 6+ months because of that. 😭 The Battle of the Thesis is at hand, and I must set my sewing mostly aside for a bit longer while I conquer this beast for the good of the realm. I shall either conquer the evil Thesis, or die on my noble academic sword come late November. Rest assured, whether House Persephone is celebrating a victory or mourning a defeat.. the sewing dungeon will be alive with the sounds of work once again after the ⚔ Battle of the Thesis ⚔ is over!! 🤩🥳
Thanks for bearing with me while I wage war on the previously-locked Castle of Academia, and hopefully come November's end, the nobility of the University of Denver will see fit to crown me a Master of HR.
Oh whoops, that's a Burger King crown. Oh well, it's the Halloween edition which I have had for years and I love it, so don't mind me. 😜
Wish me luck and come visit again in early December for previews of good things yet to come. 😁
⚔ ⚔ ⚔ ⚔ ⚔ ⚔ ⚔ ⚔ ⚔ ⚔ ⚔ ⚔ ⚔ ⚔
Naturally, any artisan perfects their craft over time, but let me show you some of the tiny details in the evolution of my coats that you might otherwise overlook and I'll share what I've learned along the way... I'm going to try to start at the beginning and work forward, so bear with me... but oh yes, whether you are patron or fellow artisan, read on... there are good things herein...!
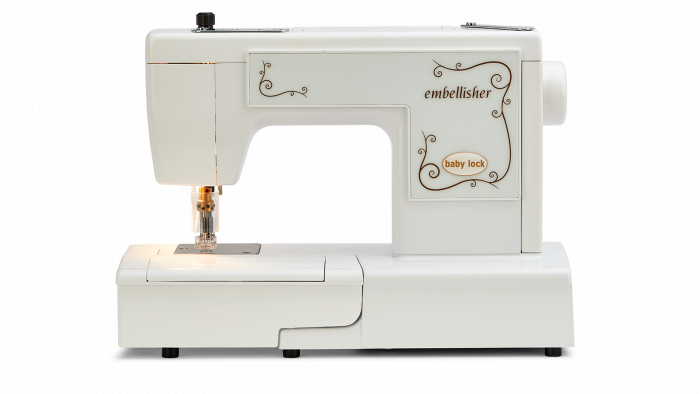
Machine-needle-feltingMy very first few coats weren't felted at all. I still have them hiding away, and they pale so much in comparison that I don't even want to sell them. 😥 The bodices just didn't feel sturdy enough to hold up the "skirt" section of the coat - they had a lot of the "droopy bathrobe vibe" because there wasn't enough structure... I'm also super picky about my garments.. All too often, I have a favorite item only to discover a hole in it. ARGH!! So frustrating.. then I discovered machine-needle-felting 😍, and in the evolutionary timeline of my sweater-goodies, that was an event with clear before/after distinctions. Sure, you can wash the sweaters in hot water and pray to the Laundry Gods that the result is what you want, but the machine-needle felting gives a lot more control over this process. Instead of throwing the sweaters in the hot water and hoping for the best, I'm actually doubling the layers with the felting. I don't want to reinvent the wheel here, but I have a blog post which talks about felting a bit more. That's over here.
It looks like a sewing machine, but it's NOT! 😎
Rather than stitching fabric together with needle and thread, Mr. Stabby and Sir Lances-a-Lot have a cluster of 12 spiky barbed needles. The little barbs on the needles catch on the fiber pores and mesh the fibers together, creating a double-layer while using no thread. How cool is THAT?! 😎
Disguise/embellish the ends of the belt ties
While there's nothing wrong with just attaching the belt ties to the waistband (and I don't want to cast aspersions at the other makers out there who sew them on this way and most do), I simply realized that this was a missed opportunity for further awesome details. 😱 Here's the belt ties on one of my very first few coats. This is what you'll commonly see with Katwise-inspired coats. 👇
But whether you have an itty-bitty waist or voluptuous curves, the waist is an area of many garments that gets a well-deserved accent piece.. otherwise why else would the world be full of all sorts of decorative belts?? 😁 Witness this lovely close-up of The Arborist. So not only did I disguise the end of the belt ties, but now it has this lovely accent piece with ✨sequins✨. Oooooo lookie, lookie! 👇
I must warn you, if you tell me that the undisguised belt ties are better than those awesome sequins on that amazing faux appliqué, I'm gonna give you the hairy eyeball and we cannot be friends. 🤨 (Just kidding... we're all pals here.)💖😁 Not all of my newer coats have sequins on this part, but I try to do some sort of accent piece to disguise the ends of the belt ties. I think it's awesome!😎
Earthtones not your thing? Here, here's something in purple instead... same concept - cleverly disguised belt-tie ends... I even matched the color of the sequins to the fleece pattern. This is on "Up All Night". 😎👇
Sometimes with more abstract-design fleeces, there's not really part of the pattern that's suited for an appliqué design-specific "fussy cut" type of accent, so I just use a generic shape, but it still looks neat. Here's a sideways heart-shape from Madazulu, one of my latest works.
If you look at a set of toggle clasps, you can sort of see this same theme/concept.. there's always a sort of "finishing touch" to cover the ends. It just makes complete sense now, doesn't it?? 😃👇
Better bodices
Okay, now we need to backtrack a bit... let's look at Blue Fires for a minute.. this coat has the older bodice style, which does not use princess seams. This was really limiting, as I could only make bodices as big as the sweaters I could find... and I almost never find larger size merino wool/cashmere sweaters. So... there are no Goddess size coats using this bodice style, and that would be why.
Look ma, no princess seams! (Bonus points if you noticed the lack of embroidery/sequins as well)👇
But notice one more thing. There's no zipper. Look again.. I feared zippers for a long time, and so my oldest coats just fastened with clips. They aren't bad, and if you want a little breeze-in-the-bosoms to keep you less-than-roasty-toasty, they're awesome.. but most jackets and coats use zippers (and sometimes buttons), it's what most folks are used to... ¯\_(ツ)_/¯
Look ma, no zipper! 👇
So.. in penance for fearing the zipper for so long, I lowered the prices on my non-zippered coats so if you really want one of my coats but the cat got cancer and you're flat broke, I'll help you out a bit. (My cat got cancer too... OMFreakingG I know that pain! 😭 She survived because she is loved, but rest in peace, my wallet.💀😅) But yeah... Am I not generous?? 😎 Ooo but I'll do even better for my fellow sewists... if you Fear The Zipper like I did for the longest time, here's how I sew them now. 😁 Spoiler alert - the result is a zipper-tape that's fully encased on both sides and has enough support that it's not all weird and wavy (which happens when zippers are attached to thinner fabric that's too light and doesn't have enough support.)
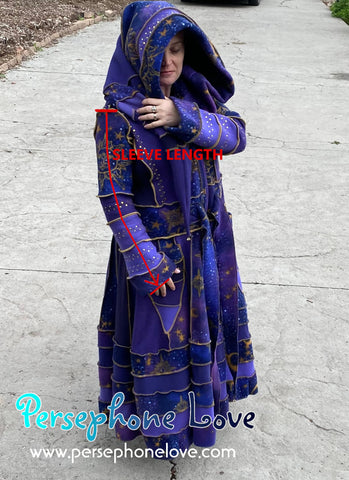
Better sleeves
Another element of The Great Coat Evolution is that I realized that fleece at the end of the sleeves just feels better. Whether there's thumbholes, or no thumbholes, it just has a better feel to it. I owe you a future blog post about how I sew the sleeves. Spoiler alert - it's not the "normal way" at all. OMG why would you endure such unnecessary torture?! Such blasphemy. I found this "sleevil"-avoidance trick works well for sleeves with thumbholes too. Quick! Someone get me a thumbhole.. okay, here we go. This one is from Winterfell.
Coats with fleece not your thing? That's okay. I CAN make coats 100% cashmere, no fleece. It won't have the patterns that you see here, but it can be done. If you wish to throw down the gauntlet and challenge me to do this, you can do that over on Fashion By Demand. The thing I like about the newer sleeves that I do, is that the overlocked seam isn't right at the edge. Let me fetch a photo of what looks like, so you can see. <hunts thru prior coat photos>
Okay I seriously owe you a better photo so I'll update this but for now, this will have to do.... As you can see, the overlocked seam is right at the edge of the sleeve. I'd often overlock twice (with the knife disengaged), or hand-sew sequins on top of this to make it more sturdy, like I did here. This textile engineering makes for a sturdier finish, but I still like not having an overlocked seam right over the hands.. This is on Peacock. 👇
See, there's really a lot of thought and engineering that I put into these coats, so that's why my sleeves evolved over time - my endless pursuit of a longer-lasting, more wearable garment. Like seriously, I do NOT want these coats stuck under plastic for eternity. (I grew up with friends whose parents covered the furniture with plastic to keep dust off and it was like... creepy). Nooooo! I want you to wear the thing! That's why it's art-to-wear, rather than art-to-hang-up-and-forget-about. 😏
Better hoods
Another thing I have learned is how to make the hoods better. I'd been felting the pieces worn about the head for awhile, and at most they were double-thickness. They had to be, in order to support the machine-embroidery and sequins that I like to add to the hood. We have to go back to Up All Night for a minute and take a closer look at that hood. It's SO pretty, isn't it?? Not only that machine embroidery but there are sequins on BOTH the inside and the outside of the hood... I used the same color in the bobbin thread on the embroidery so I can get away with this and it looks awesome. I don't always do sequins on both the inside/outside of the hood, it just kinda depends... but is this not an absolute masterpiece? I know, I am shamelessly fishing for compliments now..😏 👇
Still though, as I kept making these coats, I figured something else out. As much as I LOVE that awesome purple hood, I like the look better when I use fleece for the edge of the brim, so the hood is less "wavy" right on the brim. Here's the hood on Icicles where I used this technique and oh yes, it still has sequins!
Icicles is an AWESOME coat (OMG that blue...💙) but after making it, I realized I wanted even more structure in the hood brim.. It adds a couple of hours to the coat-making time so my prices on these newest coats are a lil' higher (hey... I gotta keep my utilities paid too 🥺, please and thank you for understanding 😅), but I started taking strips of quadruple-felted material and stuffing those inside the hood brim to give it even more structure. The result is a heavier hood-brim that doesn't give up in a breeze and hangs better. Okay, it's eyeball-testing time... Look at Kubula Ma for a second... can you see how the brim is less wavy and hangs better? At the same time, it has none of that overly-tubular "unsightly sausage" look that Katwise warns us about.. (you know it when you see it, it looks like someone stuffed one of those animal-making twisty balloons inside the brim). So if you want a hood that holds its structure around the brim and hangs nicely without collapsing too easily on your glorious noggin or that yields too quickly to a slight breeze but also doesn't look overly stuffed and weird, THIS is how it's done.😎 👇
If you're at all confused by "hood brim", here... I'll highlight it. It's this section that I'm talking about... 👇
Utopia was the first coat that has this, and every coat I've made subsequently has it. On all my newer coats that have this, it's noted right here in the sizing section, so you'll know right away. Look for "has upgraded hood brim" and now you know what I mean! If you're looking through the hoods in my hat section, this applies to those as well.. 👇
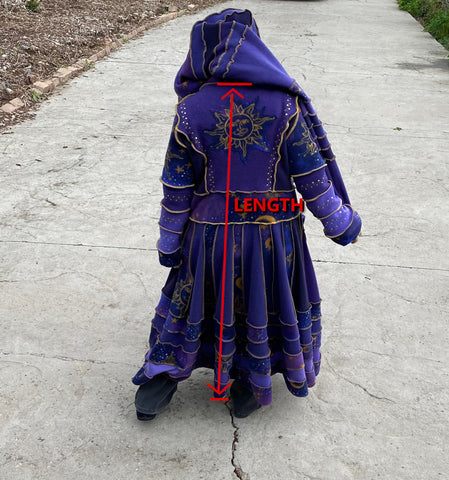
Bottom hems and felted skirt-sections
Did you happen to notice in the photo above where it says "pixie point..."? Here, let's look at that again...👇
I had been getting some requests for "pixie length" or "pixie hem", so the first coat I attempted this on was The Arborist...
These hems evolved too... After making The Arborist and Icicles, I realized I wanted them to be able to be a bit longer, so I thought to add fleece at the bottom... thus, my pixie coats evolved to look more like this, and the positive feedback I've gotten has been overwhelming, so most of my new coats will probably be made this way.. (The Victoriana coat here is flapping in the breeze a little but for the most part, these pixie points are fairly symmetrical so keep that in mind, they are not as irregular as they look in the photo) 👇
On the pixie bottom coats, I even needle-felt the skirt pieces too.. so they are the awesome super-soft double-thickness... which allows for embroidery and sequins on that section too! Ah, the level of sparkle that you just now realized you really want. 🤩 It's not quite as visible in the photo because the ones in this photo are black, but I often attach various types of bells onto the skirt, or sometimes on the pockets - in addition to my common practice of attaching little bells to the ends of the hood and the belt ties.. not to mention, felting the "skirt section" provides sturdier backing for the pockets. 😎 I owe you a better photo but I also now typically sew a narrow rolled hem on the bottoms of my coats as well as it has such a nice feel and on long coats this type of hem is less prone to catching on things.
Here's a better picture of bells at the end of the belt-ties/hood on another one of my coats.. so before you ask, YES... when I use the "clapperless" bell style, I know that two of them must hang together to make them jingle. 😁
So my newest and very best coats with all these supercool elements are a little bit more, and if you're willing to give my older stuff a new home, you get a bit of a break. And if your feeling is "OMG all your coats are an arm and a leg"! ... know that Kubula Ma was like 45 hours of work. I am not kidding - I literally timed how long it took me to make. See for yourself.. 😱👇
So yes! I do ask for an arm and a leg and your firstborn child in payment for my coats.. just kidding - your firstborn child is safe, rest assured! 😇 I do want that arm and leg though... considering how labor-intensive these coats are, my prices are actually a bargain, especially with rising materials costs (which so far, I have mostly absorbed and am holding out as long as I can.)
The lower prices on my older coats reflect less completion time, coats without princess seams or zippers, coats without embroidery/sequins, not 100% cashmere, etc. The other side of that is my newest coats use the best materials, best techniques and the most time, so the prices just are what they are. The purple coats also don't get a price break - purple cashmere (and wool) are in highest demand, hardest to find and THE most expensive for me to acquire. If a coat is just unattainable, that's why I also make needle-felted hats, arm-warmers and leg-warmers, so you can still have a treasure, and my work doesn't have to be undervalued. 😇
I do hope this has been an enlightening read that explains a lot... Can you tell that my favorite "subject" in school was "Show And Tell" from Elementary school? 😁 Anyway my main point here was to do a few things, which hopefully I have now accomplished:
I think I'm with Katwise on this one. When you make something amazing, someone will always try to copy.. so it's just better to embrace rather than fight against this. Serious, serious shout-out and gratitude to her. (Did you buy her tutorial?? You totally should. If you like my funny rambling, hers is even better) Her new shop, which has the tutorial, is right HERE.
And... If I help you make your own coats better so that consumers of handmade goods have a better experience, that's awesome, and I'm thrilled to play any part in that. That said, if you use any of my techniques, I'm also with Katwise in that I'm going to ask for just a tiny little shout-out somewhere.. pretty please? ...As I have no advertising budget and rely solely on word-of-mouth. It costs you nothing, is an excellent show of grace and I appreciate it so, so VERY much.😭💖 Whether you're on Instagram, Pinterest, Facebook, etc... please feel free to tag me! I'll even make it easy for you. Here I am on social media:
Looking for more sewing tidbits?
Having seen some folks in one of my Facebook sewing groups asking how to sew the zippers on Katwise-inspired coats, here's the way I do it... and while I break just about every sewing "norm" (spoiler alert - no zipper foot used), I think the result is pretty awesome.😎
Really quick first... super basic zipper terminology.. you only need to understand what I'm talking about when I say "slider" or "tape".. the slider is the thing you pull on to zip/unzip and the tape is that ribbon backing that you see. That's it, at least for this post. There are more terms for you zipper ninjas out there, but let's not overthink this too much just yet. 😊
On my newest coats, the zipper "tape" ends up fully encased on both the inside and outside of the garment, making for a softer wear. I've also noticed that the zipper on the finished garment is less "wavy" as the zipper tape has more structure supporting it since it's covered on both sides.
Here's what I mean.. you can see in this photo how the overlocked edge of the fleece is overlapping the zipper tape on the inside of the garment. 👇
Rest assured, it's on the outside too, of course.
For quick comparison to a commercially-made jacket, here's the inside of one of my old jackets. As you can see, the zipper tape is exposed on the inside.👇
I would be super super cool if I had videos, I know... but a video whiz I am not, so photos will have to do for now. So here's the coat and zipper at the start of this zipper-magic. If you're worried about the unfinished edges of the waistband/ "skirt portion" you can see here 👇, have faith and panic not! This will handle that. 😎
The first step is to sew all the encasing for the zipper, then serge it to the coat. I start by cutting out a couple pieces of the fleece. I'm not being super precise here about the length, but I make the two pieces slightly longer than the zipper I'm going to use.
I cut the long edges on both pieces as straight as possible (no, not with a rotary cutter... those things are the work of the devil, truly... Kai carbon-steel industrial-grade shears are WAY better, IMHO.) I then overlock (aka "serge") both of the long edges on both pieces... so now I have this:
This is where my home sergers prove useful, because it's a wee bit easier to adjust the stitch length. I use a longer stitch length so that the seams are straight and not wavy (which the shorter the stitch length, the more seams tend to be wavy... but likely you knew that already. 😉) Your machine may vary, but mine is usually set slightly above 3. Here's what that looks like on Buddha, my Babylock Enlighten:
Here's the finished seam next to my seam gauge:
This part is a little hard to explain, but first, I sew the part that will be on the inside first (the back of the zipper).. I basically place the front of the zipper face-down, and figure out placement lengthwise first, leaving extra fleece casing at both the top and bottom of the zipper. Rather than pins (which I find tend to distort the fabric), I actually prefer clips, so here's both right/left sides of my zipper, ready to have the back side sewn.. If you look at the zipper pull, you can see it's face-down. We are looking at the right side of the fleece because we're going to wrap it around the inside/outside of the zipper tape like a taco shell. 🌮 👇
I don't use a zipper foot at all. I just move my needle all the way to the right. My machine has a laser pointer which helps me see where the machine is going to stitch. You could flip this back over as well like it is in the photo just above (either way works)... the main point here is that you are sewing the inside of our "fleece-zipper-taco" first - and by inside, I mean the part that will be on the inside of the finished garment.
On my machine, the setting to move the needle all the way over to the right is over here (yours will probably be different):
Because my bobbin thread is going to show up in the finished work since I'm sewing the back side with the front side down, I highly suggest not using a wackadoodle color in the bobbin unless you're really keen on having contrasting thread. Here we are, mid-stitch.. (also remember... on the side that has the zipper pull, you have to pause and raise the presser foot -with the needle still down- to slide the zipper pull out of your way to finish stitching.. most folks who have ever sewn a zipper should be familiar with this part)
Here's what it looks like after I've finished stitching 👇:
Now, it's time to complete the zipper-taco and sew the front/outside. Maybe I could be more efficient sewing front/back at the same time, but this just helps me ensure that all of my stitches include the zipper tape so that's why I do this in two steps. While I wholeheartedly encourage the re-use of old zippers where possible, often times it's easier for just get mine from the folks at Wawak. I like their #5 nylon coil jacket zippers. That's what you're seeing here.
When I'm done, here's what my nearly-complete "zipper-taco" looks like. If yours isn't perfectly aligned top/bottom, don't panic yet - that can fixed in the next step... but you should have something that looks like this.
👇
As you can see, the right side of the fleece is on both the inside (back) and outside (front) of the zipper. 👇 At this point, if your top/bottom are uneven, unless they are miles apart, just trim 'em. ✂
On to the next steps to finish the top/bottom of the "zipper taco"... I always serge the top at an angle, and then the bottom either at at angle, or straight. Often I'll put a few basting stitches in with the sewing machine on the top end of the zipper casing before taking it over to the serger. Here's the basting stitches 👇:
And here's where I've gone and serged the top. I'll take a blunt needle and tuck the "tails" back inside the seam but they're hanging out in this photo. The end without tails, I've just cut those because that edge is going to be serged anyway when I attach this to the coat. 👇
On this one, I opted for straight on the bottom, so here's that. Same thing with the tails... the ones hanging out here will be tucked back inside the seam using a blunt needle... the other side I've already cut the tails, since that side will be serged when I attach this to the coat. 👇
So here is my finished zipper encasing, ready to be clipped (in lieu of pinned) to the coat:
When you do zippers this way, it'll dawn on you how much more convenient those clips are. I have a huge pile of them in both smaller and larger sizes.. as I'm putting clips to "pin" the zipper-taco to where it'll be attached to the coat, I focus on matching up the waistband seams. I've highlighted them in red so you can be clear on what I mean. The zipper's already matched up since it's zipped closed, so focus on lining up those seams at the top of the waistband that I highlighted in red. 👇
When I take the coat and zipper over to the overlock machine, here's the finished result. I've marked the seam in red so you can see how I serged it. Spoiler alert - I started all the way at the bottom... so I started serging down at the bottom, went all the way up (attaching one side of the zipper casing), around the neck and back down the other side (attaching the other side of the zipper casing) in one big really long seam. (Psst...it sort of goes without saying but... unzip the zipper before serging this seam.😉) 👇
Yet another spoiler alert... when I attach the hood, I actually serge over this same seam AGAIN.. so on the finished coat, the zipper "encasement" won't be as wide as it looks here. If you want to have a hoodless coat, stop here and you're good. (Why am I suddenly picturing the infamous story of the headless horseman..😂) If you want a hood, this is why that zipper encasement needs to be a bit wider, because that same seam is going to be serged twice, and it takes quite a bit of the material off. With the hood as well, I have found that it's less wonky to just start all the way at the bottom and go all the way around again.
Here's a close-up of the same coat after I've gone around again and attached the hood. Here's the inside 👇
And here's the view from the outside of that same seam 👇
Would this cool trick work with wovens? Eh, full disclosure - I haven't tried. It may not. Knits and stretchy materials are fun to sew with because they forgive you and you can get away with cool tricks like this. I owe you a future blog post on how I sew the arms to the coats... spoiler alert - it is WAY easier than normal "set in" sleevils*. (*Sleeves sewn the traditional way are evil - they are so commonly the bane of sewists).
For serging/overlocking thick seams like this (especially the hood portion!!), I highly recommend an industrial-grade serger.. my home sergers used to constantly snap threads and break needles struggling... it was sooooooo frustrating..... happy day 🥳 when I finally discovered that the Juki MO-6814D four-thread machine faithfully chomps through thick/fluffy seams like this. I have a blog post about sergers HERE.
Oh shoot - did I forget to tell you where to get the clips? Gah! 😱 Let me remedy that right now... I get those also from Wawak and you can get big clips, or small clips. Again, these aren't affiliate links... I just think these are awesome to sew with.
I've seen a few folks selling what kinda looks like knockoffs of Katwise's amazing sweatercoat tutorial (boo!😥) and my intent here is NOT to take patronage away from the fantastic Goddess of Sweaters... so if you haven't bought her tutorial and are trying to make a coat for yourself rather than buy a coat/hoodie, please consider buying her tutorial. Even if you give up and never make a coat, it's such a fun read! Katwise's Etsy shop is over HERE. The tutorial is only like $10.00. If you read my post and you start emailing me with all sorts of coat questions and haven't contributed to the artistic world somehow, this is me giving you the hairy-eyeball - don't be cheap. Brilliant people deserve to be paid for their brilliant ideas.
That said... if you're already bought Katwise's tutorial and are here looking for tidbits on how to further master sweatering techniques, if my explanation of zippering helped you get unstuck, please throw me a bone. My virtual 💲"tip jar"💲 is HERE. Alternatively, at zero cost to you, pretty please, give me a shout-out on your social media, that's worth a TON to me... whether you follow me on Facebook, Instagram or Pinterest.. and you are welcome and encouraged to tag me and I welcome you to share my blog post with anyone who might be interested or find it helpful. Spread the love! 🥰💖
There's no built-in function for me to reply to blog comments (@ intarwebs programmer people - booooo! 😥 Fix this please!) but if you read all this, I always appreciate comments. 💖 If you're really shy you can send me an email too. 😊
👉persephone@persephonelove.com. 👈
Cheers!~
Looking for more sewing tidbits?
~XOXOXOXOXOXO~
]]>
After a long wait, my e-commerce provider has finally given me better international shipping/taxes options using Global-E. International orders MUST ship via DHL, and customs/taxes are paid up front for some countries so that DHL can deliver directly
to you. Yay!! 🥳🥳🥳🥳
More info:
If you live in the any of these countries, taxes/duties are collected up front and DHL can clear your parcel thru customs and deliver to you directly:
These are the countries I can not ship to yet 😥:
Afghanistan
Åland Islands
Ascension Island
Belarus
British Indian Ocean Territory
Central African Republic
Christmas Island
Cocos (Keeling) Islands
Congo - Brazzaville
Congo - Kinshasa
Côte d’Ivoire
Eritrea
French Southern Territories
Iraq
Isle of Man
Kosovo
Lebanon
Liberia
Libya
Mali
Myanmar (Burma)
Niger
Norfolk Island
Palestinian Territories
Pitcairn Islands
Russia
Saint Martin
Somalia
South Georgia & South Sandwich Islands
South Sudan
St. Pierre & Miquelon
Sudan
Svalbard & Jan Mayen
Tajikistan
Tokelau
Tristan da Cunha
Turkmenistan
U.S. Outlying Islands
Ukraine
Vatican City
Venezuela
Wallis & Futuna
Western Sahara
Yemen
Zimbabwe
If your country is not listed in either of the lists above, please contact me via email before making a purchase: persephone@persephonelove.com.
Please know that I will not lie on or falsify customs forms.
My business records MUST match the amount of the sale. I don't like taxes either but I adhere to honesty and I obey all applicable laws to the best of my ability.
Packaging:
All of my sweatercoats that I ship out are generally sent inside a vacuum-sealed bag, where I have pulled out all the air. It squishes the coat (don't worry they fluff back out pretty quickly), and also makes the parcel lighter, as well as protects it in the event of spills in the carrier's facilities.
The boxes I typically send these in are 16" x 12" x 8". (30.48 cm x 30.48 cm x 20.32 cm in metric system.) Most of my sweatercoats once packed are going to weigh roughly ~4 - 6 pounds (~1.81- 2.72 kilograms). They ship from Colorado, USA, postal code 80905.
Depending on which country you live in, you may also see the option to see prices in your local currency. All of this is a recent and new change in 2023, so if you see anything that does not look right, please let me know. Thank you for being patient with me as I work to make it easier for people outside the USA to make a purchase. 🥰
I'm going to get into big trouble for this but I can't help it... Holly, one of my models.... is my daughter.. (hence why I know October 1st is her birthday... I was there. 😉 )
Holly, you are so beautiful and lovely, inside and out. I would think this even if you weren't my daughter. Thank you so much for modeling for me, you're a shy person and I know it took a lot of courage and you did so awesome.🥺🥰
To all my fans on Facebook who in spite of seeing hundreds of other sewing group posts remembered Holly by name and expressed a desire to see her model for me again, I'm hopeful I can persuade her again too.🥰 She's on a birthday road trip right now so I have other friends helping and I hope I haven't jinxed Holly's future-modeling for me by outing myself as her dorky mom. Whoops. 🤐
So I'll up the ante... see Holly, most likely nobody read my blog post, I'm not famous like Katwise, so your secret is safe.
If a passerby is here that I've missed, my dear visitor you are welcome to bust me for claiming there were not witnesses to the sheer amount of absolute nerdery going on here and I'll publish the comment and take full ownership of my proud mom birthday blathering. Pinky swear. 😌
But yeah, I have no shame. 😊
]]>
The basic function of these machines is that it trims the fabric edge and encases it in a thread-wrapped seam.. the seam ends up flexible and doesn't ravel. If you go in your closet and take a look at the inside seams on your clothing, you'll see a lot of serged (overlock) seams... most commercial sewing just leaves these on the inside of the garment, rather than on the outside as you've seen in my recycled sweater treasures. You'll find serged or overlock seams on both woven, as well as knit garments. The trickiest thing about sergers is that it cuts the fabric... yes, you CAN un-pick a serged seam (but OMG why would you want to... what a pain.😣). You cannot however, un-CUT. The fact that the machine cuts the fabric, plus the threading, seem to be the two sticking points that makes most folks fear the serger. If you can overcome those however, these are just great machines. I promise. Pinky swear!
Generally there are home sergers and industrial sergers... prices can range anywhere from ~$200 up to $6000 depending on which machine you get. Here are the machines that I have, and they all have names, because of course they have names. Why wouldn't they? 😁
Brand | Model | Type | Name |
Juki | MO-6814D | Industrial | "Tank" |
Babylock | Enlighten | Home | "Buddha" |
Babylock | Evolution | Home | "Darwin" |
By far, Tank is my favorite. Let me extoll her virtues and explain why... She just does one thing, and does it well. She is quieter, more powerful, and much faster than my home machines - she does a max 7,000 stitches per minute compared to a max of 1,500 stitches per minute on the average home serger. Note that 7,000 stitches per minute is SUPER FAST... like so fast it's scary. However, there's a speed control on the motor itself. You have to reach under the table to adjust it, but it's there. Babylock's newer home sergers also have a speed control, but they charge a high premium for this feature (booooooo!), that Juki just includes as standard. Neither Buddha nor Darwin have a speed control. Babylock's Ovation serger was the first Babylock model I know of to introduce this, and they charged a premium for it that I couldn't afford. Their new Triumph is now their flagship model with speed control but the automatic needle-threading features are just... meh. I can't justify shelling out $6-7K to have speed control, needle-threading, and the small handful of other design changes - none of which are a good substitute for basic sewing skills, and a little patience and persistence. 😎
Because Tank is "fully submerged" into her table, there's less vibration. I also never have to hunt for the foot pedal and it never runs away from me - it's just built into the table. The big pedal on the left is like the "gas pedal", touch that and off she goes... and the pedal on the right is like the clutch - it raises the presser foot. Once you get used to this, it's a big time-saver. I LOVE not having to hunt for the foot pedal.
Tank's knife system is also great. It uses a "guillotine" style knife where the upper knife comes from above and so far, nothing has slipped past. So no fluffy bits slipping past and getting caught in the seam. Replacement knives are also fairly cheap - much more so than for my Babylock machines. Juki knives are around $5.00. Babylock knives are ~$20 and up.. and each Babylock model is slightly different so my spare knives for Buddha can't be used on Darwin. Boooooo! 🙄
Tank is also easier to clean because the needle-plate is held on by two screws that are easily accessible.. a ton of fuzz tends to build up there and being able to remove the needle-plate to clean all of that out is such a big help. Babylocks are designed to make you take the machine in to the shop and pay to have it cleaned. I wouldn't mind as much if the machines weren't priced so high up front.
The thread stand on Tank is also better and sturdier. It looks like Babylock has changed their thread stands a little, but the ones on the models I have are very bouncey, and sewing with bulky items is tricky and you have to really take care not to bump the thread stands lest you end up with a tangled mess and broken needles/threads from the thread tangling around itself up in the thread stand. That was just driving me nuts, and was another reason I invested in an industrial machine.
So at this point you might be wondering why even have the Babylocks or home machines? They're more expensive, they've got a lot of plastic parts that break easier, they're slower, louder and go in the shop for repairs/cleaning more often... Well okay... here is where the home sergers do have some advantages:
So really the main advantage of the home sergers is you can make quick adjustments and changes, but their motors just aren't as powerful as industrial ones so they are not as good on really thick/fluffy fabrics, and the easy features are a big cash commitment up front. They are lightweight and you can carry them around, but I have never taken one of those "serger classes" promised by the dealer, so meh. I'm an introvert, I figure stuff out at home. The idea of carting my machine around just seems silly. As for the industrial machines, they are heavy, the machine head alone weighs ~30 pounds, so you will shed bitter tears if you ever move. Plus you have to change the oil on the things every so often, depending on just how much you're sewing. As for service, if you do need some sort of repair, frequently the dealer will come to you... they'll just charge for the time and the drive. My Juki dealer is 60 miles away, so yeah, it'll be a bummer if I break something but thus far.. Tank is mostly indestructible. 😈
As for threading being a sticking point on the industrial machines, it's very similar on most industrial machines. Once the machine is threaded, the easiest way to change your thread color is to just cut the thread and tie a good sturdy knot between the old thread and new thread.. the knot will pull through everything except the eye of the needle... so once you get it threaded, life is fairly easy. However, you still need to know how the thread the darn thing. Spoiler alert: the color-coded dots are your friend. I don't want to re-invent the wheel, so these are my favorite videos for how to thread these machines...
The University of Derby has a great basic video which takes the time to explain how to thread from the thread stand, which helped me tremendously. I was able to thread my MO-6814D the first time just by watching this video and taking my time. Note that not everything here is applicable to the MO-6814... I just mentally skipped over those parts. But they at least explain the thread stand, which if you've never used an industrial machine, how would you know? 🤔
Probably the most valuable thing in the video above is the thread stand part. In a nutshell:
With the top tier:
thread from back to front
With the lower tier:
thread top-to-bottom first
then thread from back-to-front
With the thread guide on the machine head above the tension knobs:
thread the right hole back-to-front
thread left hole back-to-front
Then it's sort of like flatware at a fancy dinner... start at the outside and work your way inward... in other words:
Sewing Gold did an awesome video on this for the MO-6814S... so if you have an MO-6814D like I do, this will make even more sense because the threading is the same... I don't want to re-invent the wheel, so here's their video:
I posted links in this blog post but here they are again... so if you want to check out Juki overlocks, you can start here. Bear in mind, they have TONS of other machines like coverstitch machines, buttonhole machines, all sorts of amazing machines which I'd have to throw out all my clothes and run around nekked in order to have room for so... eh - you're on your own for learning about those. However - check with your local Juki dealer, they may have classes on Industrial machines. Denver Design Incubator does, so if you're in Colorado, there you go! They are right next door to Ralph's Industrial Sewing, where I bought my MO-6814D.
I mentioned more powerful motors earlier, and industrial machines come with different types. Alexander Dyer does a FANTASTIC video about this on YouTube, soI won't reinvent the wheel here. I will say that my machine has a servo motor which has all the power I need and when not in use, the machine is absolutely silent. It reminds me very much of a family member's hybrid Honda Accord, which when you stopped at a stoplight, the car would turn off, you got none of the subtle "jiggle" that you get sitting at a stoplight when the engine is running.. it felt like the car had stalled, it was almost creepy.... but step on the gas and off it went! By contrast, a clutch motor on an industrial overlock will generate some constant level of noise when you turn it on.
Here's Alexander Dyer's video on motor types. He goes into a LOT of detail:
If the industrial machines are just too big and heavy and scary, you can check out Babylock sergers here. Note that my Evolution is from 2012 so that model is long discontinued, along with the Enlighten as well. There's nothing wrong with buying a used machine if you want to save some cash. The downside is it's not under warranty, but I've actually had really good luck with my Enlighten. I bought Buddha used for ~$1400 several years back and I use him a lot more than Darwin. The main reason I keep Darwin is that he is a convertible machine... which means that you can change a setting on the loopers, swap out the overlock guide for a table and turn him into a coverstitch machine. If you don't know what a coverstitch is or are just curious what that looks like, Edith Sews has a decent video about this:
I have um, not yet even used this function. 😜 If you like to sew with a lot of knits and want to be able to do both overlock/serging as well as coverstitch, a used Evolution might be right up your alley. The home machines are versatile, and designed for light-weight sewing for folks who like to go slow and be super precise in their stitching.....HAHAHAHAHAHA!!! That is so NOT me.
Hands down, I love my Juki the best. I did buy it fully assembled so I haven't included unboxing/setup instructions for you, so if you do get one, I really recommend your local dealer. The cost is going to be about the same anywhere you go (~$1600.00), and it was just easier. The only thing I had to do was set the machine head into the table, and attach the rubber belt to it that the motor uses to move the pieces-parts, and add the oil. OMG do NOT forget the oil!! Think of it like a small car engine. 😉 This video on the MO-6816, will apply to your MO-6814. 👇
Sewing Gold has another video, also about three minutes that shows you how you will need to change the oil on these machines... this is something to keep in mind when wondering whether to buy one.
I do owe you a video on how to change the stitch length on the MO-6814D, as I haven't found one that I felt explained it really well, so check back later for that update.
If you have your machine threaded and your stitches are coming out wonky, here's a helpful graphic to help you troubleshoot which tension setting might be wrong. Full credit to DIBY club for this. Read their full post HERE.
If you live within driving distance of me and still fear the serger/overlock, reach out and we can arrange a time for you to see my studio and I'm happy to help you overcome that fear.
The serger/overlock machine is a WONDERFUL work of magic that is well worth it. It's been around since 1881 and has only gotten better and easier to use in the last ~142 years. If your great-grandparents used one, it looked a lot more like this:
Here's an old Singer 81-20 with the side and front covers open so you can see a little more of the inner workings:
You can see the machine has just one needle, so this only does a 3-thread stitch - the one needle thread interlocking with the upper and lower looper threads.
Here's an old illustration of the same machine that might be a little more clear...
There is some variation on all machines, but on more industrial machines, the "head" is the portion you're looking at, which does not include the motor. Many of these old antiques are still floating around and still WORKING, which is super cool. Vintage Sewing Machine Garage on YouTube has a great video where he puts an old Merrow A-3DW-3 to use and the thing still works. The video is a bit long for my ADHD short attention span, but it is super cool to see one of these machines still working:
If you want to get a better view of the loopers and the inner workers of one of these older machines, Alex Dyer comes to the rescue yet again with this awesome video where he cleans and restores an old Merrow 60 BW and the thing overlocks just as well as when it was first sold. WOW. I think this model came into production around ~1924, so this machine is literally nearly 100 years old.
Oh wow... did you actually READ all of this?? Was it useful?? I like to shout-out worthy businesses and other artisans but there are no affiliate links on my site, so if you found that anything here was at all useful, helpful or just plain humorous, a shout-out on social media costs you nothing, and means a LOT. You are free and welcome to tag me or give me a follow. Here I am on social media:
If you enjoyed any of the videos (credit absolutely to the original creators), please take a second and click the LIKE button, show 'em some love! If you like sewing, there's lots more goodies and they always appreciate subscribers.🥰 Regardless, thanks for readin', and reach out and keep in touch any time. I love to hear from you! 😁
Looking for more sewing tidbits?
It sounds crazy that someone with a 34" bust would want to wear a coat with a 50" bust. Gah! The insanity! Well, not quite... see, these coats are meant to be forgiving. The slap-dashery is intentional. Don't tell that to my great-great-great-grandma though. In the 1800's, misbehaving flesh was cinched into place and squished into submission. They also didn't yet have overlock machines and all these fantastic stretchy fabrics that we have now, so fit had to be more precise. She's probably rolling over in her grave at the way I dress, but times change and we've got more freedom now. They do look dapper though, don't they? 🤩 They're not smiling though, so I wonder if the clothes back then were a lot less comfortable.. 🤔
(Yes, these are my ACTUAL great-great-great-grandparents.
OMG look at how long his arms are!!)
👇
Rest in peace, dear great-great-great grandma and grandpa Beem 💖... back to the present day we go... so again, back to a person with a 34" bust wearing a 50" bust coat. Yes, it CAN work. I'll show you. See, that doesn't look so crazy, does it?? It actually looks pretty good.👇
And now, dear friends and readers... I will show you a series of marvelously explanative photos that are marked up to show just how I measure these coats. Imagine that the red lines that you see are my measuring tape, and you're all set.....
Take a look with the arms outstretched and NOW you can see the extra room - it does exist! I've also marked where I measure the coat. So *technically*, it's not the bust itself that I measure... it's the armpit-to-armpit, which I measure flat and then double. I do the same with the waist, and I've marked these two measurements in the photo so you can see where I take these. 👇
I'm a short little lady, so this coat is almost full length on me. Here's the measuring points for length. If you are taller than me, the coat won't fall as close to the ground. I measure from the base of the hood (where it's attached to the bodice) to the bottom of the skirt-piece. This is not at all intended to be exact and perfect but gives a general idea of whether the coat will fall closer to the ankles, or whether it will be more of a "midi" length coat (great for really really short folks). 👇
I'm going to show you this same photo, only now again with the shoulder-to-shoulder measurement so you can visualize that too. Remember, this is a coat, so it should be bigger than your own shoulder-to-shoulder measurement because I'm assuming you're going to wear clothes under this. I take the shoulder-to-shoulder measurement across the back... using the seams where the sleeves attach to the bodice, just as you see here: 👇
I also take the time to measure the sleeve length, because people have arms that are shorter, some longer. (Didya notice how LONG my great-great-great-grandpa's arms were? OMG!) So here's how I measure the sleeves. I use the shoulder seam as the starting point and then measure down to the bottom of the cuff, like you see here. 👇
I also measure the hood length too because I get a lot of requests for coats with "extra long hoods". For that, I measure from the brim of the hood, to the tail, just like you see here: 👇
So just remember - coats aren't bras or knickers - they are not supposed to exactly match your body measurements. Bigger is better because these are intended to be overcoats - you need room for your clothes underneath 'em. The princess-like seams in my newer coats don't always quite sit right on the bust, I'm getting better with each coat.. but my main goal is that there's enough room that you can zip up the coat comfortably and not feel like you're uncomfortably squeezed into the thing. But see? Wearing a coat with a 50" bust over a 34" bust is completely reasonable. I've got room, but not so much that it's shapeless. 👇
I had to overhaul everything to gain this sort of functionality but for my coats and hoodies, you should now see filters that say "max bust size" and "max waist size"... (If you're on mobile, it's all under "filter and sort".) 👇
Keep in mind, the main point of these filters is for you to eliminate anything that is too small for you. You'll probably get best results if you pick your existing measurement, along with several larger measurements. Remember, these are coats/outerwear, more room = better. If you play around with those filters, you'll see that there is a lot of variation in the fit in my coats - that's intentional. People are not made uniform, and thus fashion shouldn't be either. It's sooooo much simpler if you know your own measurements, and can shop by those instead of some ridiculous concept of "tag size" that isn't even consistent from brand to brand... I can't stand the way fashion manipulates tag sizes, so my cool measurements filters are here to try to save us from that sort of nonsense. 😎
I am quite sure I am not the only person that has found something cool, taken it to the Dressing Room of Truth and then thought... "Um, that is NOT a large!".😉 The fashion world has such treachery sometimes.... Let's move towards measurements instead and push the rest of the fashion industry to do the same.😁
Oh - there are a FEW things that I don't regularly measure and that is not meant to neglect you, dear friend... just to save myself some time and insanity:
If any of these are likely to be a sticking point or something you're not sure about, it's okay to ask. I'll be candid in that dealing with returns is time-consuming and awful and never fun for anyone. Boooo!😥 I'd rather get it right the first time. It is less time for me to answer questions about fit than we both get stuck dealing with a return. It is okay to bug me, don't at all feel bad about it! I like email, or you can use one of the contact forms. I'm really shy though, so I will probably stroke out if you try to call.😱 OMG I adore you, but don't call. 😳 I promise I will try REALLY hard to get back to you quickly. Pinky swear!!
Now if you need help measuring YOU, here's a quick article to help you out. This one is geared towards folks that don't have a measuring tape for sewing, so whether or not you have one, I think this should cover you:
https://www.wikihow.com/Take-Clothing-Measurements-Without-Measuring-Tape
I love that you're interested in these coats enough to look, and wherever you get your coat from, get one that FITS... and wear it at every opportunity!! I hope this helps explain all the coat measurements and you feel enlightened and joyous. Thanks for reading. 💖💖💖💖💖💖
Do keep in touch.🥰 Here I am on social media:
XOXOXOXOXOXOX
Coat pattern:
There's no "pattern" - it's a general tutorial by Katwise which covers just the basics. My patchwork sweatercoats are my own interpretation of her tutorial, which you can get her tutorial HERE. If you want to try to make a coat that looks like mine do, know that there is a LOT more that goes into my coats which is way above and beyond what she covers in her tutorial. I cover some of that information here in my blog posts, but not all. You'll also need specialty machines like mine as well. 😇
(I'm half joking, half serious 👇😂)
Patchwork spiral skirt pattern:
Nope, I adore you, but I do not have a tutorial at this point in time. Most of what goes into my skirts are adjustments made on-the-fly as I'm making them, depending on what size denim jeans I can get. After I've made a few more of these I may have a tutorial in the future, but there isn't one right now. I want to have at least a little bit of a head start on the copycats out there.🥺🙏
Machines:
Needle-felting machine:
This is THE machine I use more than any other - my needle-felting machine. You can't make coats that look like mine without it, because the needle-felting changes the structure of the material and makes it behave differently - and needle-felted wool/cashmere provide enough structure to support the embroidery and sequin work. I like the Babylock Embellisher EMB-12 which VERY sadly has been discontinued. Here’s the original product page:
https://babylock.com/machines/specialty/embellisher-1
If you get lucky, you might be able to find one of these hiding somewhere at your local Babylock dealer (use the Babylock website link to look up your local store). I found my backup machines on eBay. You can also search on Craigslist and see if someone local has one they're willing to part with. These machines were a pricey ~$600 brand new and came in both 7-needle models and later 12-needle models. Go for the 12-needle if you can. I've also had a Simplicity 12-needle model (also discontinued) and the Babylock machine works way better. The bummer about buying used is it's not under warranty, but this machine is fairly simple so if something's wrong, it's not a complicated repair. Janome made a needle-felting machine as well, the FM-725 model, but I'm not sure if they ever made a model with more than 5 needles.
If you want this machine but can't find a used one anywhere, please join me in asking Babylock to bring these back into existence. You can contact them on this page HERE. I am actually very hopeful that if enough folks ask, they'll make these again, perhaps even with some improvements (it really needs a longer power cord/foot pedal). I also replaced the light bulb on mine with a brighter, LED light bulb that doesn't heat up.
If you're thinking "haha 🤣.... what 🤔...?" and wondering what the heck I'm talking about, don't miss my post about felting. That's right HERE.
Overlock/Serger:
My absolute favorite overlock (aka serger) is the Juki MO-6814D. I got mine from Ralph's Industrial Sewing up in Denver: https://www.powersew.com/
I have both this industrial model as well as several home sergers, so I can write lovely prose about the differences between the two, and that should be a whole separate blog post (note to self: write future blog post extolling the differences between home/industrial overlock machines.. UPDATE - blog post written! It's right HERE). Love the Juki the best!
Regular sewing machine:
I have a Babylock Destiny, which I use for on-the-fly non-hooped embroidery stitches that a regular sewing machine won't do. Warning, this thing will destroy your wallet. ☠ I was only able to afford mine when my late grandmother left me a bit of money, so it's named Emily, after her, in gratitude. She loved to sew, and I felt it was a good way to honor our mutual love of sewing and to feel connected to her. They've upgraded and changed the models (Babylock is famous for doing that) 🙄, so you can probably get a used Destiny for a lot less than I paid for mine.
Thread and Notions:
My Katwise-inspired coats use a LOT of thread, so I prefer to buy in 6,000 yard Tex-40 spools (Tex-40 is a stronger and thicker thread than Tex-27, which is what you'll find in big-box stores like Joann's). My favorite sources for thread:
Venus thread: https://vti.saha.com/
Venus thread has the best range of colors. If you want to get from them, be sure and get a color card. I think it's around $15.00 and well worth it. The staff at Saha (the manufacturer) are SO wonderful and friendly to talk to! I'm not sure but I *think* you have to be registered in your state as business to buy from them, but you can just call and ask. I'm an introvert and if I can reach out, you can do it too, pinky swear!
California Thread Supply: https://www.ctsusa.com/
CTS has a far smaller range of colors than Venus, but is generally a bit cheaper if you buy in a big enough quantity. They also have embroidery thread as well. Invest in a color card, it's just worth it. I have both the embroidery AND the overlock thread color cards. Their website is always a bit glitchy, but they are generally good when you can get an order through. Ooooo UPDATE - their new website is https://www.calthread.com/. (I think the old one still works too - it's the same company.)
Wawak: www.wawak.com
Wawak's thread color range is a bit meh, but they are very quick to ship. They also have a good zipper collection. When I don't have a reclaimed zipper, I just get them from Wawak. The #5 jacket zippers are all good quality YKK-brand.
The Thread Exchange: https://www.thethreadexchange.com/
Don't bother buying invisible thread in tiny store-bought spools. It tangles up and is SUCH a pain. I buy mine from The Thread Exchange on large industrial size cones. They'll last you forever, and are a lot less prone to twisting/tangling. They also have grab bags of rayon and polyester embroidery thread so if you're into embroidery, it's a great way to build up your stash of less-expensive thread to play around with. They've got needles too.
Scissors:
I cannot say enough wonderful things about Kai scissors. I have them in 11-inch and 12-inch and I will NEVER go back to regular store-bought scissors. I also don't trust rotary cutters as I nearly sliced my fingertip off with one. I'll spare you the gruesome photo. Bleh. Instead, look at these beautiful things. Are these not the most amazing scissors you've ever seen?? (Wawak sells these too.)
Sequins/Beads:
C Cartwright's Sequins are simply unmatched in colors, shapes, sizes. I have 230+ different colors, shapes and sizes of sequins and just when I think I have every color, they come up with something new. They ship from Arkansas and send things pretty quickly too.... like usually the next day! Are you into beading?? They just started carrying seed-beads as well.
Pro-tip: If you know you are going to use a lot of one color, just get the 50-gram or 100-gram bags, but be aware that they are not always labeled... I re-bag mine and label them so I know which color is which when it's time to re-order. 😎
Fleece fabric:
Most of my fleece I have gotten from Joann's. I'm not proud. They are a big-box store, and I wish they'd pay their staff more. Plus they have a habit of introducing a really pretty pattern and then quickly discontinuing it. So they don't get a link. Booooo! 😒
OMG but did you see that awesome pink Leopard print fleece on Proper Patola??? 😍 👇
My animal print fleece, my favorite place to get that is Fabric Empire.
Iron:
I forgot to mention my iron! What a sacrilege!! 😱 A good iron is one of THE most important tools. I like the Rowenta Steam Station (model DG8624) - it is a monster of an iron because it has a detachable tank. This means that:
I got it on Amazon (ugh, not so proud of buying from the Bloated Bezos Empire😐) so I'm not going to post a direct link, but if you search under "Rowenta Steam Station", it should come right up. Yes, it was ~$200-300 but if you sew and iron as much as I do, it is like all good tools, worth the money. My iron derives joy from burning me, so of course her name is.... Burnadette.🤣 (Her predecessor was the earlier model and his name was "Burnie Sanders".) She is so important to me, she sits on her own circuit, because she pulls a whopping 1500 watts of electricity when on. Yes. I literally had a special dedicated electrical circuit installed just to support this iron. No regrets. It's still cheaper than accidentally blowing up the electricity and burning the house down. 😉 Safety first, always.😎
Ironing table:
I find traditional ironing boards way too narrow and hard to work with, so I have a whole ironing table and I LOVE it!😎 The table itself sits on top of a door with adjustable-height legs bought from IKEA, and my ironing table rests on top. The table itself is a home-made piece of plywood with cotton battling stapled to it with heavy-duty staple-gun staples, and I covered the whole thing with this cover bought from Joann's...
The link to this at Joann's is right HERE. Here's the packaging, the brand name is Sullivan's:
Honorable mention:
Shout out to Denver Design Incubator for their efforts to provide shared maker-space as well as instruction on the ins and outs of industrial machines and apparel construction. Even if you don't work in a "cut sew" operation, I think it's great to have an appreciation of how everyday clothes are made. If we didn't have apparel manufacturing and you didn't have sewing skills, you'd be walking around in your birthday suit! 😮 Here's their Facebook page and please show them some social media love too. They are a very worthy organization.
https://www.facebook.com/DenverDesignIncubator/
Well, did I miss anything? If so send me a nag: persephone@persephonelove.com or reach out on social media.
Again - I don't do "affiliate links", so there's no financial incentive for me to ever steer you one way or another. I prefer it that way. The suppliers and businesses above earned their shout-out just by having great service and great products. If you found valuable info here that was super helpful, you can always buy me a little one dollar bag 'o sparkles and it is greatly appreciated. 🥰 My virtual "tip jar" is here, although truth be told, if I've been helpful to you in any way, a shout-out or a follow on social media costs you nothing, and is even more valuable to me. You are free and welcome to tag/follow me! Here I am on social media:
Looking for more sewing tidbits?
~XOXOXOXOXOX~
A felting machine looks like a sewing machine, but isn't. There's no thread, no bobbin, NOPE. Sacrilege, you say! 😱 Actually.... bear with me.. The felting machine uses a cluster of needles, typically anywhere from 5-12 needles which all have nasty, nasty little sharp barbs on them. The thing looks like a torture device, seriously! The barbed needles punch up and down through the fabric, tangling the fibers together on very small scale. This causes the fabric pieces to mesh together, using no thread. With wool/cashmere fibers, it basically felts the fibers but gives you a lot more control and precision than, say wet felting (aka nuno-felting), or purposefully washing your wool/cashmere in warm water. This is what enables me to take a 2-ply cashmere sweater, mesh it in a double layer and create a luxurious, super soft and warm 4-ply cashmere material. It is AWESOME. And I am very very very very very mad at Babylock for discontinuing this beautiful machine.😡 Here's the original product page:
https://babylock.com/machines/specialty/embellisher-1
My machines have names of course - Mr. Stabby, and his backup machine is Sir Lances-a-Lot. It's hard to see here, but this is Mr. Stabby's fabric torturing device. You will see very tiny dots on the needles. Those are the barbs. Mr. Stabby is a 12-needle machine, but the cluster of needles is still only about the size of a finger, and that's why it takes so long to felt a larger surface area. The upside is that this gives me a lot more control.
Here's a close-up of the needles:
I really wanted to do a video of my own so you could see "Mr. Stabby" and "Sir Lances-A-Lot" in action, but Emma from Stitch and Create just did such a stunning job with this one (and I just love her voice), she covers even so much more than I'm doing, and I thought you'd like to see the incredibly wide variety of things you can do with this machine. The 12-needle cluster only covers an area about the size of a finger, so that is also why it takes me so much longer to make my Katwise-inspired coats with all the felting work on the bodice, sleeves and parts of the hood (and starting with my pixie-point bottom coats, I needle-felt the skirt panels too). Since I'm using this on something intended as a garment rather than art to hang on the wall, it's important to be very thorough. I don't skimp on time - the idea is that your recycled garment should truly last. I am going to shed bitter tears the day Mr. Stabby and Sir Lances-a-Lot cross over the rainbow bridge, because with this machine you can do sooooo much more than typical Katwise-inspired coats that you might have seen.
If you're not ready to go all-out on a coat, you can always look into one of my needle-felted hats or arm-warmers. You can also just order a cheapie sample packet so you can see the difference for yourself before you make a big investment like one of my coats, and those are here:
https://www.persephonelove.com/collections/random-oddball-bits If you order anything else from me and want a sample sent along with it, just let me know and I'll just include it along with your new purchased treasure - I try to ship pretty quickly though so send me an email and let me know you want this included before I send your item out!
👉persephone@persephonelove.com 👈
I am warning you though, the felted 100% cashmere is absolutely luxurious and addictive. When I sell my works at local craft fairs, most folks aren't able to hold the arm-warmers/hats without taking one home. The needle-felted cashmere really is that awesome. 😎
If you want to try to snag a felting machine for your own use and try this out, I got my backup machines off of Ebay. Click HERE to see if there are any up for grabs right now. See, am I not helpful? 🥰
Felting machines DO come in industrial grade versions for felting large areas of fabric, but they are an investment of several thousand dollars. They are SO cool though, I hope one day to own one!! The sound quality isn't so good on this one, but I wanted you to get to see what a larger industrial grade felting machine can do...👇
The machine above comes from Feltloom.
Another company, FeltCrafts, also has a decent demo video showing what you can make with industrial needle-felting machines... so cool!! 👇
That video above is from FeltCrafts.
On both of those industrial machines, you can see the needles are moving a lot slower, but covering a wider area. I suspect that it probably takes several passes through an industrial machine to get the same super-felted result that my sweatercoats have. Oh I still want one though... because an industrial grade machine with a bed and rollers that pull the fabric into the machine, would likely enable me to use even more of the super-small odd-shaped wool/cashmere pieces that I typically end up with. I use up most, but not all of the wool/cashmere and have a growing pile that I'm saving in hopes of one day owning one of these fantastic machines. 😍🙏
Also - I don't do "affiliate links", so there's no financial incentive for me to ever steer you one way or another. I prefer it that way. Do check out the rest of my blog, there's useful stuff there whether you are a coat-shopper or just an idea-shopper. If you dig up anything here that was massively helpful or inspirational or that just made you grin from ear to ear, you can always buy me a one dollar bag 'o sparkles and it is greatly appreciated. 🥰 My virtual "tip jar" is here:
https://ko-fi.com/persephonelove
Truth be told though, your likes/shares/follows on social media are worth a LOT more to me, though🥰 .. and your virtual support on social media costs you nothing at all. 😎 Here I am on social media:
And if you're one of my fans/followers, thanks sew much!! 🥰 I hope this was an enlightening read. Oooo if you dive into the world of machine-needle-felting, send me a photo of your first project - I would love to see it.
👉persephone@persephonelove.com👈
Looking for more sewing tidbits?
And if that's not touching, have you seen this amazing speech by P!nk about self-acceptance? This is truly a beautiful message from a mother to a daughter about being your authentic self and seeing your beauty, rather than feeling ashamed. Even if you've seen it before, it still gives the most beautiful shivers.
I have such an ardent desire to make things that fit people of ALL body types.. tall, short, slender, fuller... all of it. If I haven't made something to fit you, please, do not EVER say that you're the wrong size. I had a dear friend at a craft fair say "I'm too fat to fit into this" while admiring one of my coats and I just about ran out crying, it just broke my heart. If I haven't made something to fit you, that's MY shortcoming, not yours. Sometimes I don't have the right size materials to make the size you need and that's not at all within your control.
Whoever you are, wherever you are, be a beautiful person on the inside, and I promise you, it makes you beautiful on the outside! Just be the real you, because the real you is BEAUTIFUL.
XOXOXOXOXOXOXOXOX
I hope this will brighten your day as much as it does mine. This will just grab you by the feels. Such a great story!
https://www.kktv.com/content/news/Tenn-high-school-football-players-gift-their-clothes-to-bullied-classmate-560131231.html
Ever look at your clothes and wonder who made them? Many of us don't. I can't look at a T-shirt and say "Oh this was made by Madeline." We are many degrees separated from our food, our clothing, and our commodities. I hope that changes and we take a more careful and holistic approach to consumption. Ever noticed how T-shirts become thinner and thinner? Less material goes into the shirt, lowering the cost for the producer but chances are that new shirt will have a hole in it after just a few wears, so you either toss it, or donate it to your local thrift store. We buy five times more clothing that we did in 1980, and on average things might be worn seven times before they get tossed. (Source: https://www.wsj.com/articles/the-high-price-of-fast-fashion-11567096637)
We throw millions of tons of cheap, mass-produced textiles into the landfills every year. This is my peaceful protest. There IS a better way.